Top 12 Sensory Board DIY Ideas
Share
Do you want to expose your little one to a variety of sensory experiences in a safe and organized way? A sensory board encourages sensory learning by allowing your kid to safely experience new objects and textures all in one place.
And the best thing is that you can make them with everyday items lying in your home. You can even customize them to what your child is interested in and what you have on hand. Shiny wrapping paper, a patch of multicolored beads, and a cluster of cotton balls are a few fun ideas to add texture and color to your sensory board.
If your child is a bit older, you can also use deadbolts, gears or wheels, and a piece of cloth that can be unbuttoned and buttoned to make a sensory board.
If you’re looking for a few more ideas to make sensory boards, then keep reading ahead.
Sensory Board DIY Ideas to Stimulate Your Kid’s Senses
We have curated a list of 12 DIY sensory boards that you can easily make at your home with the things that you already have.
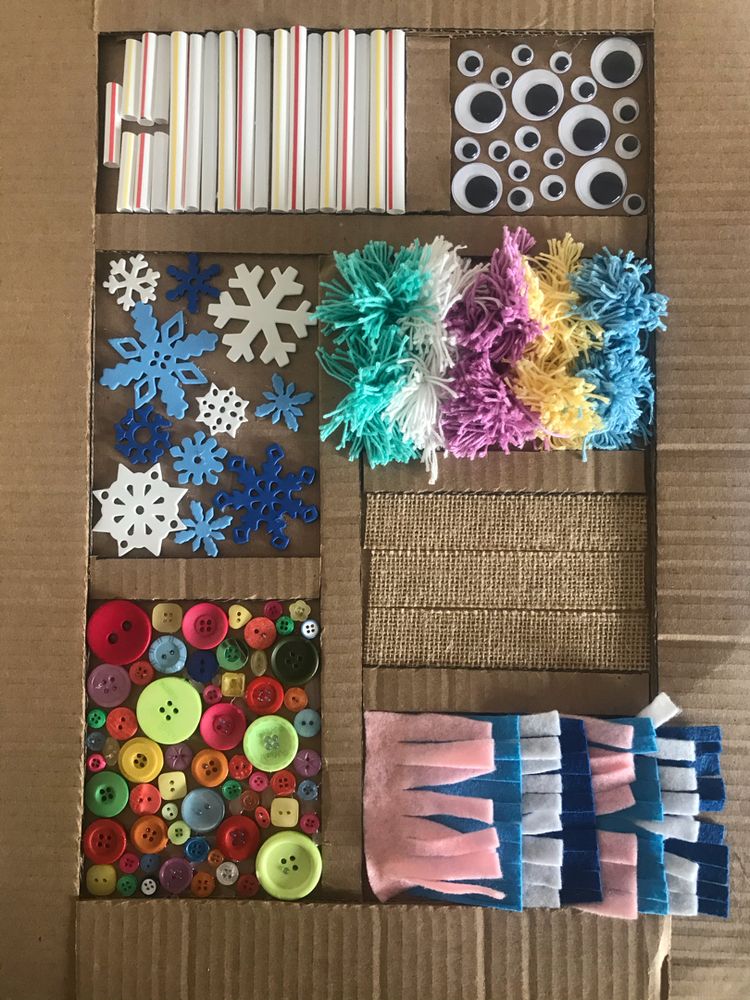
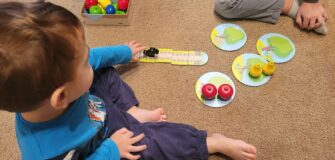
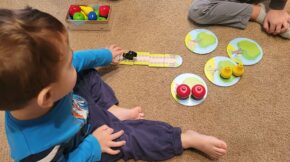
1. Peek-a-Boo Sensory Board
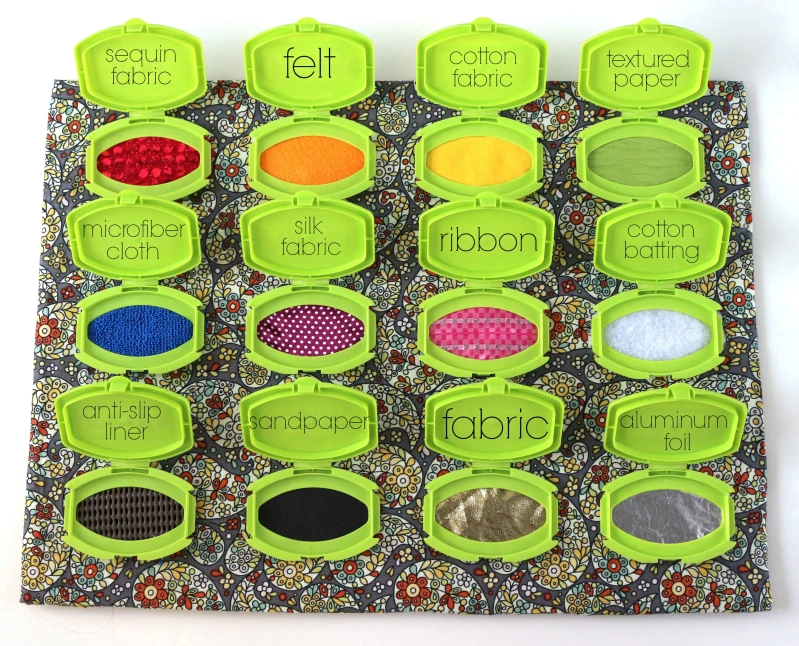
Peek-a-boo sensory board can be a great way to familiarize your kids with the world around them. It is based on the idea of revealing or hiding objects to ignite the natural curiosity of your kids. You can use materials like pom poms, dry pasta, bubble wrap, or corrugated cardboard to make this sensory board.
- Cut out a piece of cardboard in a way that fits all the lids. Try to spread out the lids wider, as it will become easier for your kid to access the material.
- Cut down materials that you want to fit behind the lid, like fabrics, and hot glue them properly to the back of the lids.
- For materials that you want to fit inside the opening, such as the rotini pasta or pom poms, glue the lid down first. After that, hot glue the pasta or the pom-pom inside and ensure the lid closes as you go along.
- Don’t close the lids completely; otherwise your kid won’t be able to open them.
2. The Techie Sensory Board
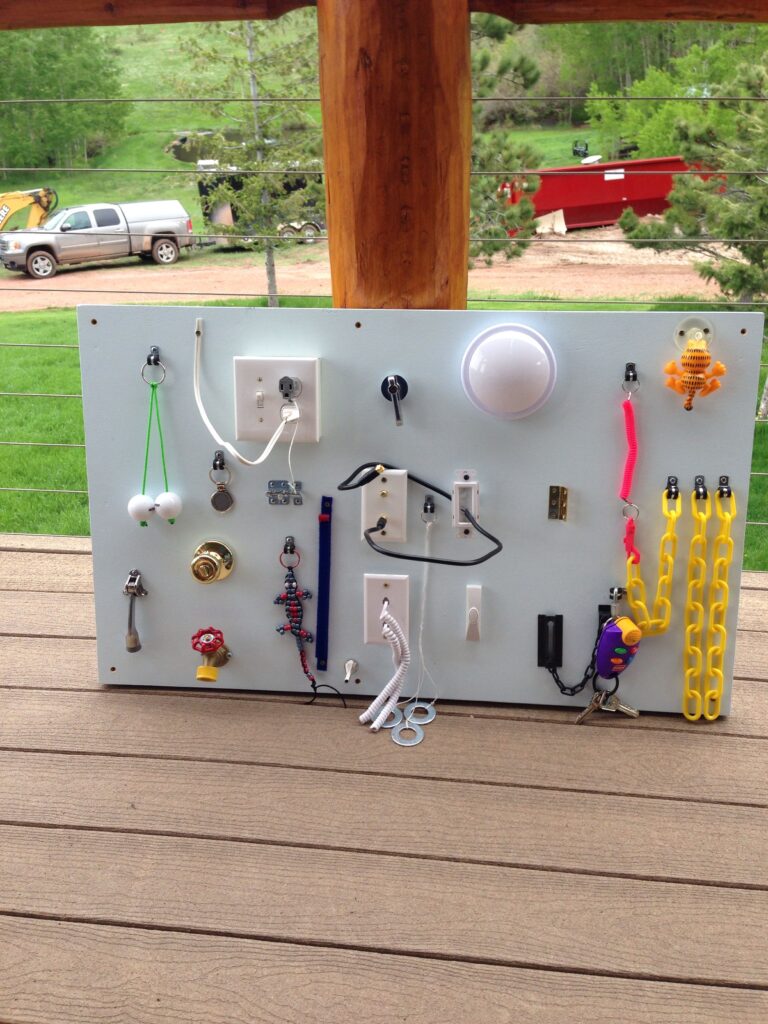
If your kid doesn’t show any interest in figurines or stuffed animals but loves technology-based products like TV or music systems, then the techie sensory board can be a good option for them. The board comprises a bunch of buttons and a keyboard that your child can easily press. While creating the board, stick to a particular color scheme and stay away from too much decoration, as it will lead to lots of visual stimulation, which might confuse your child.
- Sand down the busy board and spray paint it white.
- Buy accessories and hardware that you want to incorporate on the board.
- Place one nut in between the spinner area of the fidget and the board and another one between the end of the bolt and the fidget spinner so that the fidget spinner can spin.
- Screw all the accessories and use gorilla clues for the badge pull, tailor’s tape, and light switches.
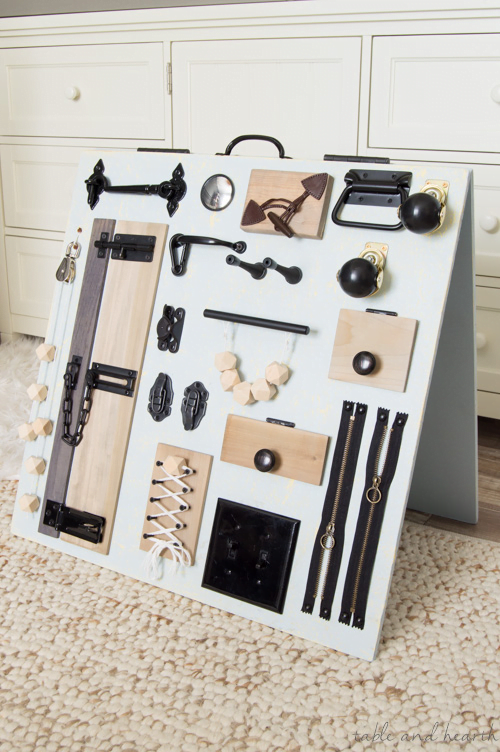
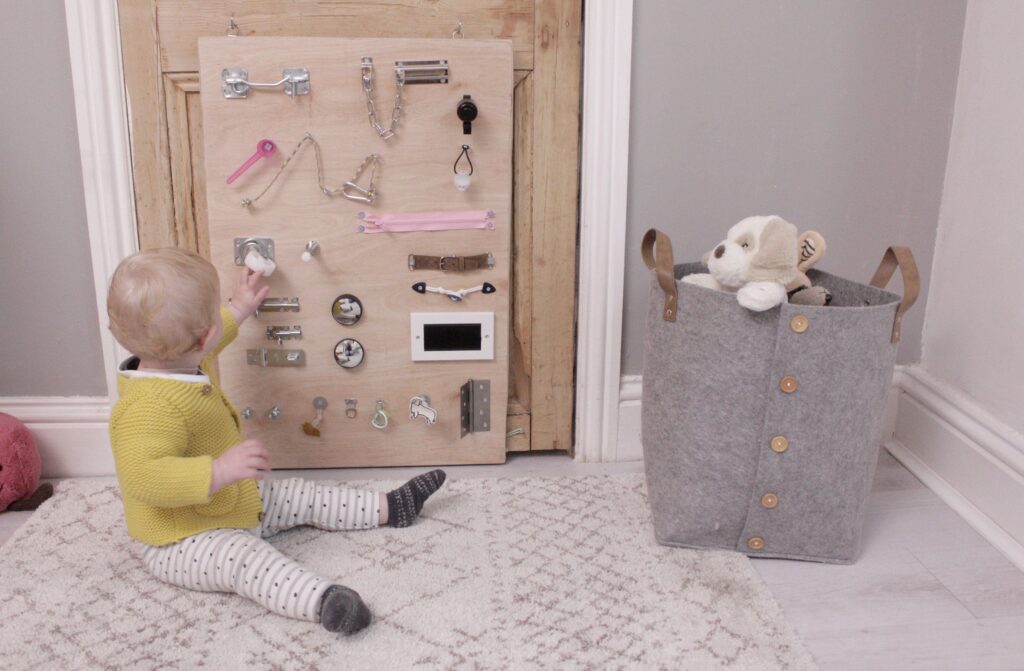
3. DIY Latch Board
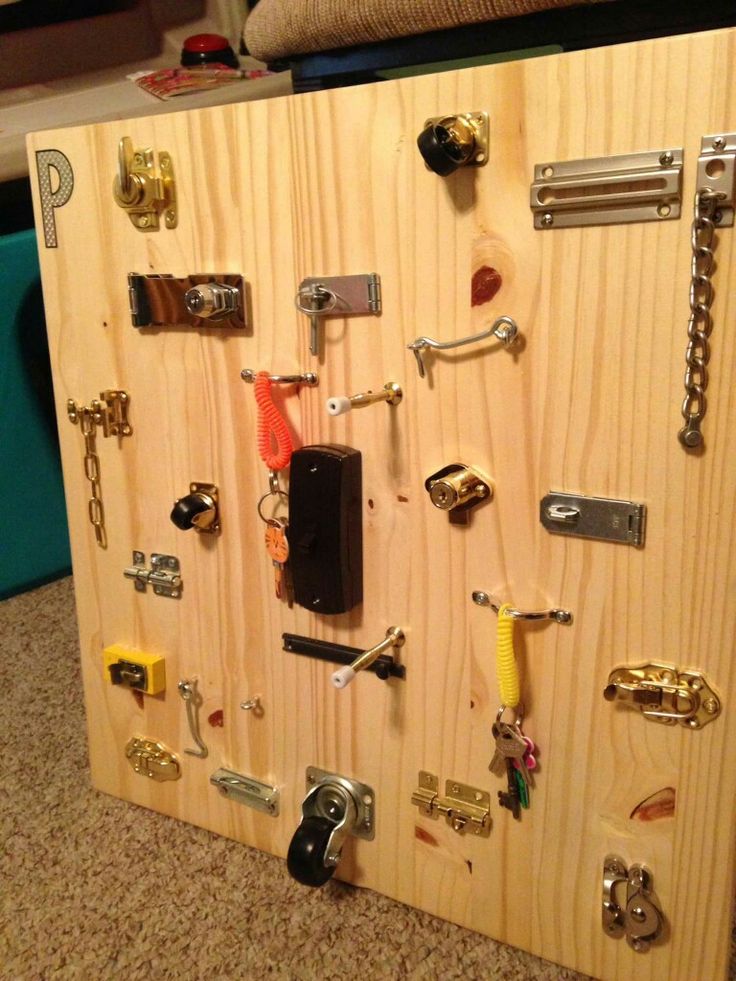
Are you looking for a toddler toy to make learning interesting and fun? If yes, DIY latch boards can be a great way to help your kids explore all their senses. Your kid will have lots of fun shutting and opening the hinges and latches.
- Cut and sand a wooden board to ensure there are no sharp edges.
- Attach handles, hinges, latches, and locks. Sand all screws properly to help your kids have a safe play experience.
- Attach two heavy-duty chains next to the locks and secure them with small keys.
- Cut small shutters for the hinges so that your kids can open and close them.
- Drill all the accessories and latches to the board and give it to your kid to play.
4. Mermaid Fabric Sensory Board
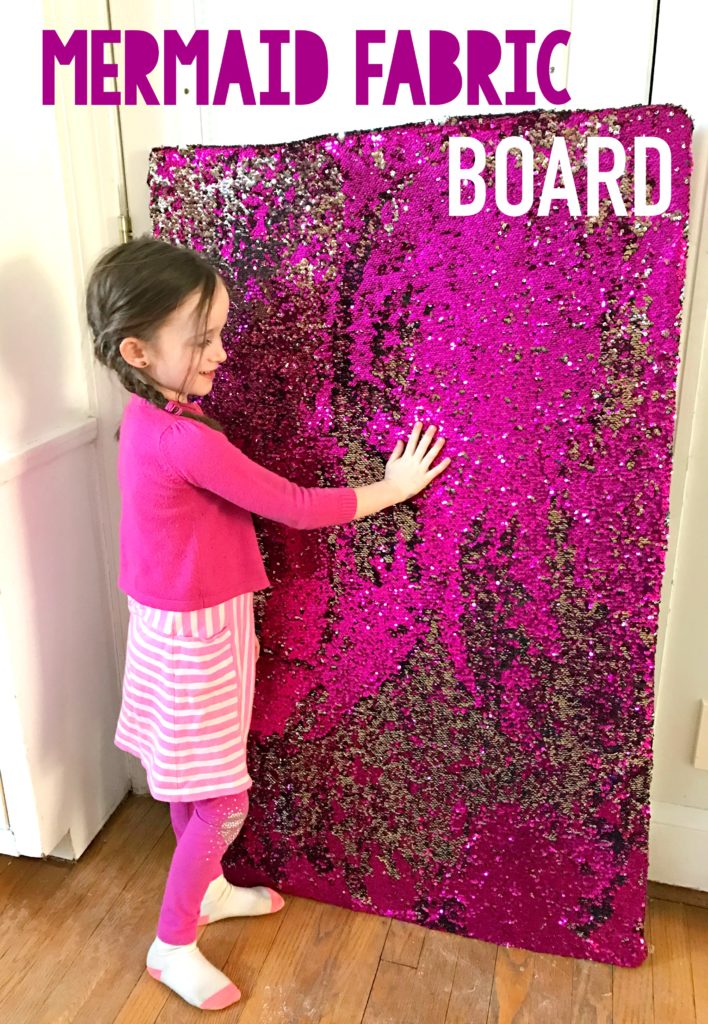
Let your kids explore the amazing world of mermaids with the help of the mermaid fabric sensory board. This is a fun craft idea wherein you use sequin to create a magical water-like effect. When your kid moves their fingers through the sensory board, the sequins will follow their direction and give a ripple effect like water.
- Cut the cardboard to the same size as the mermaid fabric. Squeeze the glue down the cardboard’s long side and glue the fabric into place. Keep stretching the fabric as you glue. Keep stretching the fabric as you glue until all sides are glued down.
- Glue the mermaid fabric to the backside by flipping the cardboard.
- Put the mermaid fabric sensory board on a table so that the kids can touch it and explore it using side-to-side motions.
5. Rustic Sensory Board
For a sensory and tactile play experience, you can’t go wrong with the rustic sensory board. This sandwich-style busy board has got shower curtain hooks, handles, and a sliding lock to make playtime fun and interesting for your kids. The black fixtures, natural wood, and white rustic paint give the sensory board a rustic look.
- Sand your wooden board and paint them in whatever finish you like.
- Attach two door hinges to the board, and on one of the top edges, put a handle.
- Lay out all the pieces and hardware and install them.
- Use the heavy-duty adhesive gel to secure the little wooden doors.
- Cut the hole for electric switches using a jigsaw.
6. Sensory Wall Wind Chimes
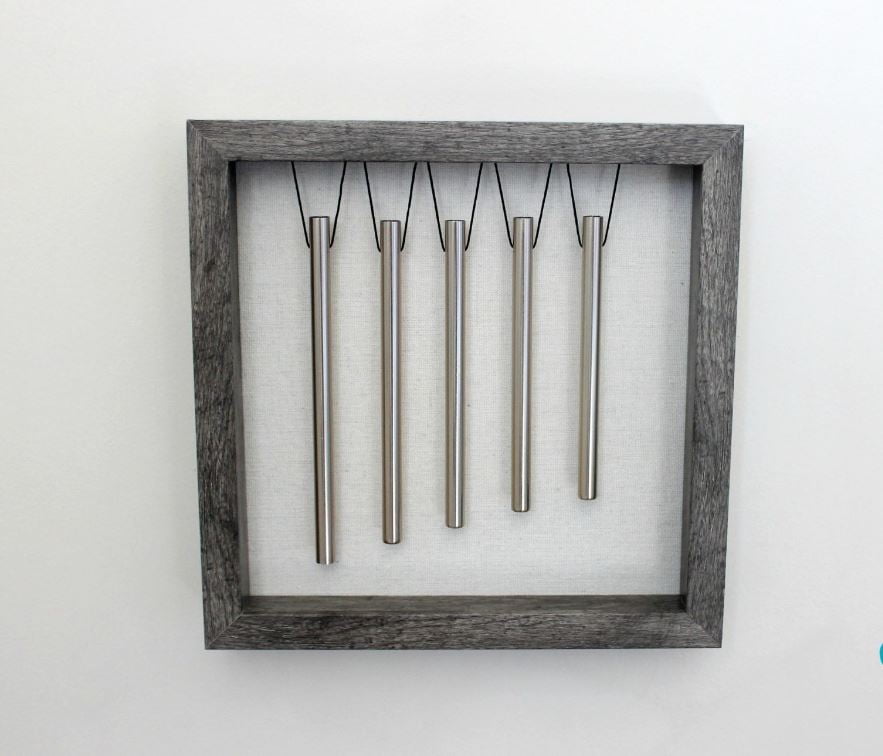
If your kid loves musical instruments, then the sensory wall wind chime can be the best gift for them. When the wind blows, or your kids tap it with their fingers, it will play a soothing tone to help your kids relax. In place of simple wind chimes, you can also use animal-shaped wind chimes to familiarize your kids with the jungle world.
- Disassemble the wind chime while keeping the string intact. If the string doesn’t remain intact during the process, you will have to buy a sturdy string.
- Cut each metal chime at different lengths using a pipe cutter.
- Take the square box frame apart and hang everything so it doesn’t show. Find out where you want to hang your chime pipes. Mark the spots with a pencil and drill a small hole big enough for the string to fit through.
- Weave the string through the chime and tie a knot if needed.
- Carefully move the pipes and string around until they are aligned at the top.
7. DIY Fabric Sensory Board
This is another fun sensory board idea that you can create by repurposing some old linens or clothing that you don’t use anymore. You can use a single or a variety of fabrics to encourage your kid’s visual stimulation. This homemade sensory board will keep your toddler or baby busy and improve their intellectual and physical abilities.
- Get a medium-sized wooden board and cover it with your favorite fabric from all sides or leave it as it is.
- Now glue velcro, textured papers, hair elastics, sponges, buttons, and rugs onto it.
- You can incorporate as many colorful textures as you want or stick to a minimal approach.
- You can also sew the items that are getting glued onto the fabric.
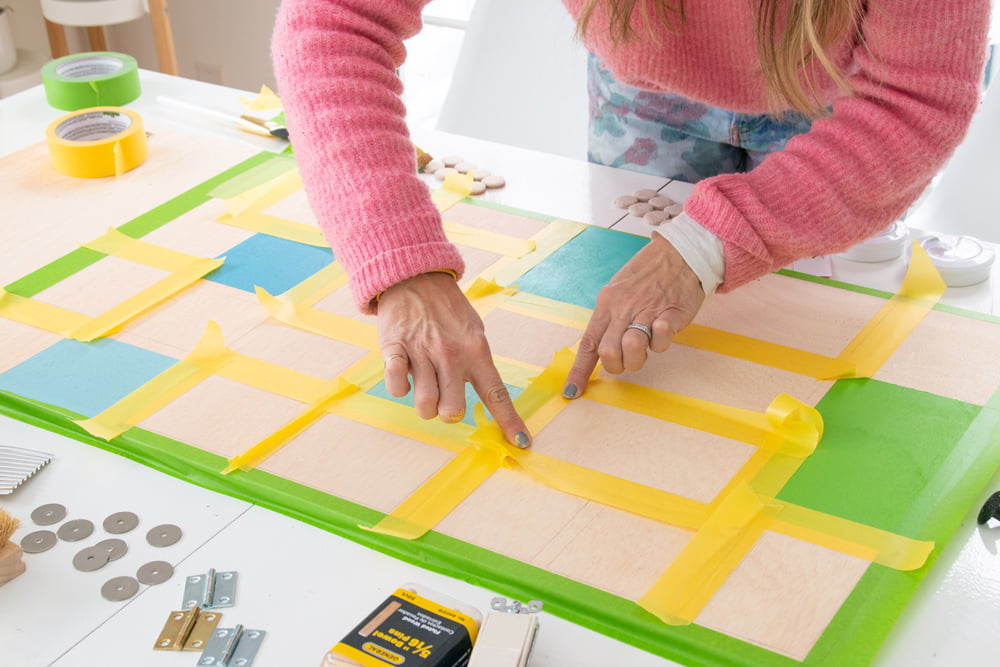
8. Touch and Feel Frames
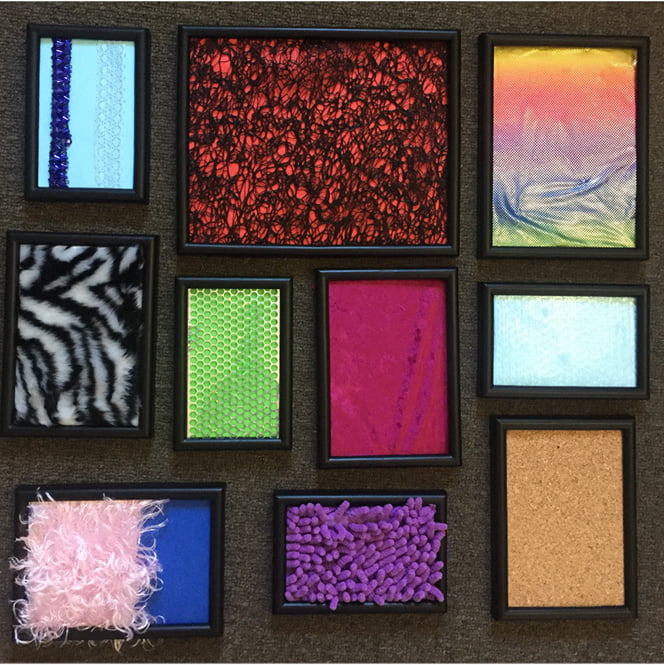
Babies learn a lot through the movement of their fingers, and the touch and feel frames are a wonderful way to promote their sensory development. This DIY sensory board enhances finger stimulation as the kids try to figure out the things in the frame. Try to use different colors and textures while making the frames so that your kid’s playtime becomes more interesting.
- Cut a wooden frame in your desired size and sand its edges.
- Search for different textured and colored items in your home, like wallpaper, ribbon, and sparkling paper. If you can’t find anything at your home, you can also visit your nearby store.
- When you have a nice selection of all the items, attach them to the backboard of each frame at a certain distance.
9. Glitter Sensory Board
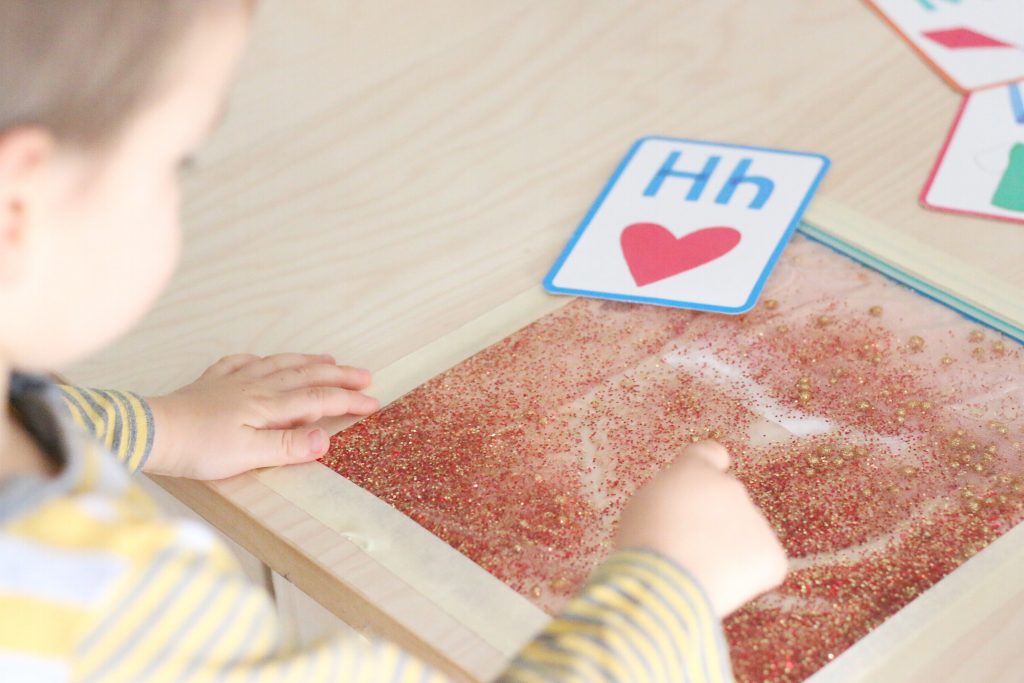
Do you want to create a one-of-a-kind sensory board that your kids will love to play with? If yes, you can use some glitter to make your sensory board pop out and keep your kids engaged for a long time. You can create an ocean-themed sensory board with blue glitter or nature inspired board with green glitter. While creating this DIY board, you’ll have to be a bit creative with its placement.
- Collect glossy fabric or glitter in different textures and colors.
- Cut a wooden board and sand its edges. Cut the fabric in a way that it is the size of the wooden board.
- Now, place the fabric or the glitter all over the board. You can use one or dual-colored shiny fabric or glitter to create this project.
- Add plastic buttons and straws to give an interesting look to the board.
10. Motion Busy Board
Teach your little ones basic skills like closing and opening a door with the motion busy board. This board not only opens and shuts but also has many interesting items that your kids will love to play with.
- Select a pine shelving board and sand smooth its edges. You can also paint it using acrylic paint.
- Secure fidget-type toys or hardware to the board. You’ll have to screw most of the items.
- For the door handle and light switch, drill a hole all the way or partway through the board to allow it to turn or move once secured.
- Once the project is complete, let your kid open and close the door and touch and feel the other objects.
11. Car Dashboard Upcycled Sensory Board
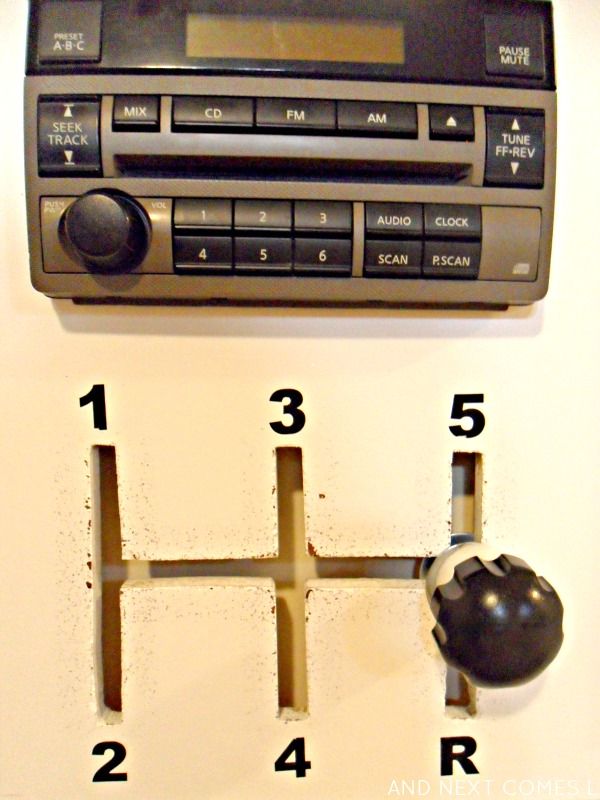
This car-themed sensory board can be the perfect choice for kids who love exploring various parts of the vehicle. The best thing is that you can upcycle different items in your home to create this sensory board. You can use the steering wheel of your kid’s old motorcycle or the headlight of their old car to create this project.
- Try to find the items related to the vehicles. You can easily find your kid’s old motorcycle or car lying in your garage.
- Cut the main board wherein you’ll install these items.
- Paint the board and the wooden handle in white color.
- Spray paint the steering wheel or other parts of the car in your desired color.
- Install gear shift and stereo on the center of the sensory board.
- Make a door with recycled wood and put an old map inside it so that your kids remain amazed when they open the door.
12. Sensory Board With Feathers
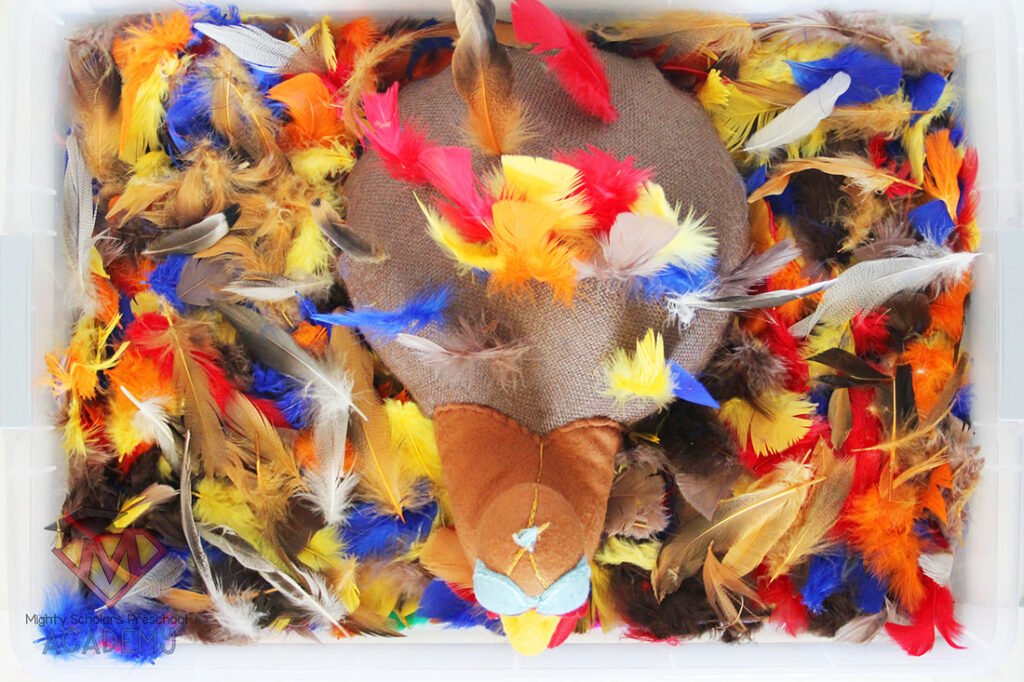
A sensory board with feathers is perfect for your little ones to touch and explore. You can also incorporate a bathroom loofah, colored pom poms, and tissues to let your kid experience new sensations. All these things are very safe for your kids, and you can allow them to play all alone with this sensory board.
- Cut a plywood in your desired length and paint it white.
- Now place the bathroom loofah, feathers, pipe cleaners, trash bag, and tissues on it.
- Glue all the items on the board and check if they have got fixed properly.
- If you can’t glue any item, you can also drill a hole and nail it.
Conclusion
A sensory board is an excellent developmental toy that you can easily create with everyday objects. Your child can learn about shape identification and experience new textures by touching the objects on the board. As your child becomes familiar with the objects on the sensory board, you can create a new one or change up your board to continue introducing new experiences.
Remember, you don’t need to spend dollars on educational toys to promote your kid’s sensory development. Even DIY sensory boards can play a valuable role in your kid’s overall development. If you need some inspiration to create these interesting boards, you can check out the ideas mentioned above.
With the help of these ideas, your kids will achieve their milestones easily and learn new things every day.
Frequently Asked Questions
What are the Benefits of DIY Sensory Boards?
DIY sensory boards are easy to make, and you can create them with everyday objects lying in your home. They are great learning toys and can help your child get acquainted with the world around them. Sensory boards teach kids how to work with their senses and hands and promote their overall development.
What is a Sensory Board?
A sensory board is a learning toy that provides a unique sensory experience to your kids. It features a range of objects, textures, and toys that can be touched, felt, and played with.


