Fun Camping Crafts for Kids: Easy DIY Ideas
Share
Going on a camping trip with family is a lot of fun, but having children running around all the time can be a little tiring.
However, you can keep them busy and give yourself some much-needed break by getting them involved in camping crafts. These are easy to make, keep the excitement going, and give them something to do while you are taking care of other things.
Here is a list of several DIY camping crafts your kids will love. Check them out and get on with them.
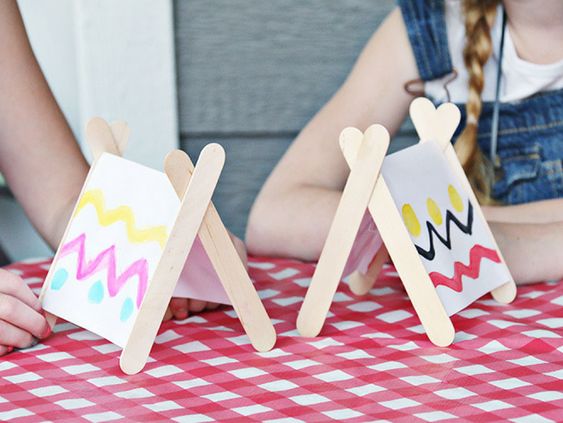
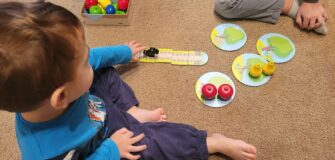
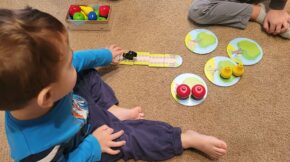
1. Mini Camping Set Craft
Mini Camping set crafts make up to be a great camping craft. They are easy to make, and the kids enjoy making it. You will need a few more things for this camping craft DIY than you would for other at-home DIYS, but trust us, it is worth it. Not only would your kids enjoy it, but it would keep them busy for a little more while than anything else.
You can use more things like Artificial stones, Twigs, patterned paper in color blue for the lake, felt sheet to make the grass, red pipe to make it cleaner and give it a campsite feel.
Instructions
It is very easy to do this DIY. With minimal effort, you can get your kids to engage and love this DIY.
- The first step in the Camping craft DIY is to cut the patterned paper for the tent into rectangular pieces. They should be 12*6 inches. You can very easily find some cardstocks that are 12*12, and you will have to cut them in half to get the desired size and measurements. With that said, if you want to make them a little smaller, it is up to you. You can either cut in the ratio of 9*4.5 or 6*3. Just remember your sheets should be cut in rectangles.
- After cutting your sheets, make 3.9 inches on the paper. Keeping this mark in mind, fold the sheet in a way that looks like a tent. Make three folds, exactly at 5.9 inches, and then whatever paper is left, paste it. This will give you a triangle. If you have cut a 12*6 inch sheet, you will get a 6-inch wide structure that has triangles on both of its ends.
- Using glue, fix 4 popsicle sticks, 2 on every end of this triangular structure. Stick one stick first and overlap the other on the first one. This will give you the camp tent you want your child to make.
- To give the whole scene a better look, set up a campsite using these tents. Use blue cardstock to make the lake or the waterbody you want to make. Then, put the green felt grass to give it a more natural look. If your children are of appropriate age, you can even ask them to cut wavy shapes out of the green felt paper to give it a look of the green grassland next to the lake. Now, add some artificial stones, and put your tents on this. You can also add a mini fireplace to this, and viola! Your camping set with mini tents is ready. This will make it a memorable experience for your kids that they will remember.
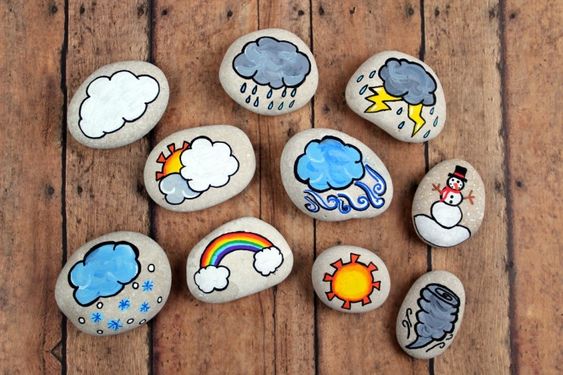
2. Story Stones
A very simple DIY camping craft that your kids will love is this DIY Story Stones. They are very simple to make, and they also encourage your kid to be very creative. You do not need a lot when it comes to this DIY. Here is a list of things you will need and an instruction guide on how to do it.
Things You Will Need:
- Stones
- Chalk Pens to draw on stone
Instructions:
- As mentioned above, it is very easy to do this DIY craft. All you must do is ask your kids to find some smooth stones. This will be a fun task for your kids.
- After finding them, give them the chalk paints and ask them to draw a simple picture of what they liked the most on the camping trip. This could be anything, from the campfire to the lake; whatever your kids like, they can draw. However, make sure they give their pens ink they have put on the stones enough time to dry before they put in another layer of any other color.
- This is a very creative game for the kids as they not only have to pick and draw but also observe what they like the most. Additionally, it is a great souvenir from your trip that you will remember for years.
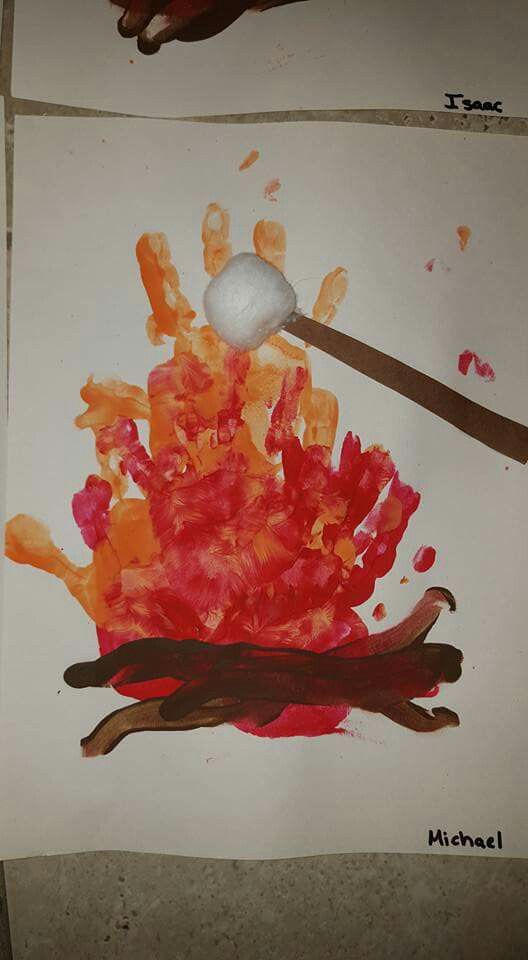
3. DIY Campfire Handprint Craft- A Perfect Souvernier
This DIY campfire Handprint craft is a great activity to do on a camp. It will not only keep your kids busy but also give you something to bring back home. It is easy to make it, and you need very few things.
Things You Will Need:
- Orange and Yellow Paint
- Glue
- Paper or wood. Both of them work, but the wood looks nice.
Instructions:
- The first thing to do here is paint your child’s hands with the campfire colors. These are yellow and orange.
- After you have painted the hands, imprint them on the wood. The fingers will act like flames, while the palm will be the core of the fire.
- Once the print has dried, you can add more elements to make it more memorable. You can stick some tiny sticks or leaves to your artwork.
- Finally, using a marker or a pen, write down a special message on the artwork. You can write anything, including a message from the trip or when you took this trip, to make the whole thing memorable.
- This is a very easy DIY, but it makes it an amazing one. It is very easy to make and also very fun. You can do it with a child of any age, leaving you happily surprised.
4.Popsicle Bird Feeder
A great craft that is also functional is this popsicle bird feeder. Thanks to this creation, your kids will learn how to help other creatures around them and also have fun. You need very few things to get on with this DIY, which is very easy to make.
Things You Will Need:
- Jumbo Colored Craft Sticks
- Wood Glue/ white glue
- Twine
Instructions:
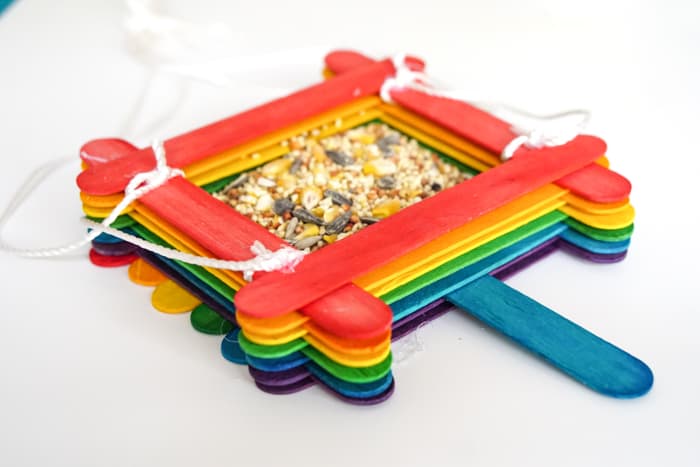
- The first thing to do is to build the base for the bird feeder. Start by laying 6 of the jumbo sticks next to each other. This will lay the base for the bird feeder. After this, glue two sticks across the base. Then, add two more across the two sticks. This will keep your base together. To stick the sticks it is very easy. You just have to place four glue corners on the four corners and add two more sticks. All of this will ensure that your bird feeder is sturdy.
- Building The perch: The second step is to continue adding sticks. Add more sticks in the middle of the craft stick and continue gluing them in opposite directions. Continue gluing, and you will get a wall. You have to place the sticks one after another, and you will get a perch.
- Add A Rope: After you have built the wall, you have to add ropes. Cut your rope into four pieces that are about 2 feet long. Tie each piece to the corner of a stick and level it down. Make sure all four pieces are correctly placed so the weight is distributed fairly on the sticks. The last thing to do is tie all the ends. You have to make simple loops. Do not pull the ends through the knot, and you will make a loop. You can even add some glue to your knots to ensure they stay in place.
- We are Ready: The last thing on the list is to fill your bird feeder with bird seeds. Near your camp, find a tree and hang it. The birds will come and eat from your bird feeder. Your kids will enjoy watching them eat from the bird feeder you made.
Tip: If you do not have a popsicle stick, you can use things from the campsite. You must glue them together like you glued these sticks in the above DIY guide.
5. DIY Toilet Paper Roll Binoculars
Binoculars are fun, but Binoculars that your kids have made are even more fun. They are creative and made out of waste materials found around the home. It is also easy and makes everything fun for your child.
Things You Will Need:
Instructions:
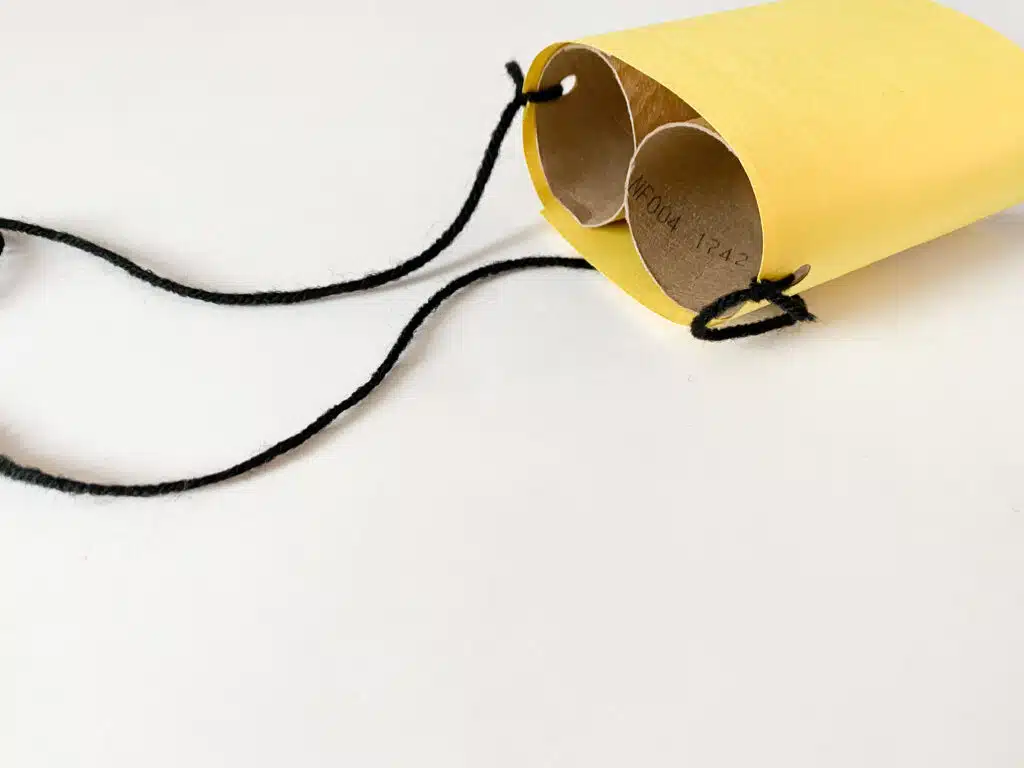
- You start by taping two toilet paper rolls together using masking tape. This is the base of your binoculars and needs to be taped well.
- Next, you have to wrap this base in construction paper. For this, cut the construction paper to the length of toilet paper rolls. Now, your child can easily decorate this by painting it, but first, you have to wrap the toilet rolls nicely. Secure it with masking tape, and then let your kids show their creativity on this.
- Finally, punch two holes on the sides of this and tie some yarn there. This will let the binoculars hang. You can also skip this step if your child does not need it. Viola! Your DIY Binoculars are ready.
6. Colorful Duct Tape Water Bottle Holder
It’s important to have water while your kids are on a camping trip. However, it becomes very fussy to go after them to get them to drink water. A great way to do this is using this colorful duct tape water bottle holder, which is a great camping craft. With very few things, you can make the water bottle holder very easily.
Things You Will Need:
- Water Bottle
- Cheap Drink Cozy
- Colorful Duct Tape
- Tape Measure
Instructions:
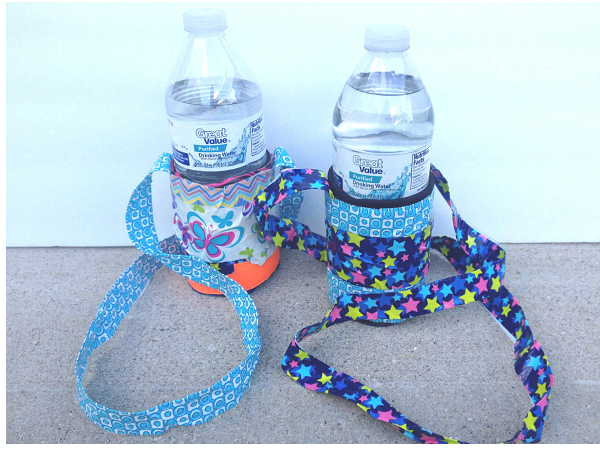
- The first thing to do is to use your drink cozy. It is easy to find it in any dollar store, and all you have to do is slip your bottle into the bottle. What this does is give shape to the bottle. You can use a reusable bottle for this, but if you are using a disposable bottle, you can use it later on to make some other DIY.
- Once the bottle is cozy, start covering the sides with duct tape. It is not necessary to cover the bottom part, but cover the sides very well. All you have to do is cut stripes to wrap around the cozy.
- Now, the next step is making a strap for your drink holder. Using the tape measure, determine how long you want your strap. If you are planning to use this strap diagonally, make sure it’s a little longer.
- Cut off duct tape in a length that measures as long as you measure it. Now, fold it in half-length-wise. Once you are done with this, your strap will be ready. However, you will need help from someone to do so.
- Now, you have to attach this strap to your drink carrier. To do this, position the strap on opposite sides of the cozy. Use more duct tape to secure it. This way, your bottle holder will be ready. This is one of the camping crafts that will keep your kids engaged for a very long time.
7. Leaf Rubbings Artwork
There is no better camping craft than an artwork you can take home. Post-trip, you can hang this artwork in your home and remember the sweet memories of your camping trip. It will not only give you sweet flashbacks but also remind your kids how much fun you had. It is an easy camping craft and a lot of fun.
Things You Will Need:
- Watercolor
- Paintbrush
- Leaves
Instructions:
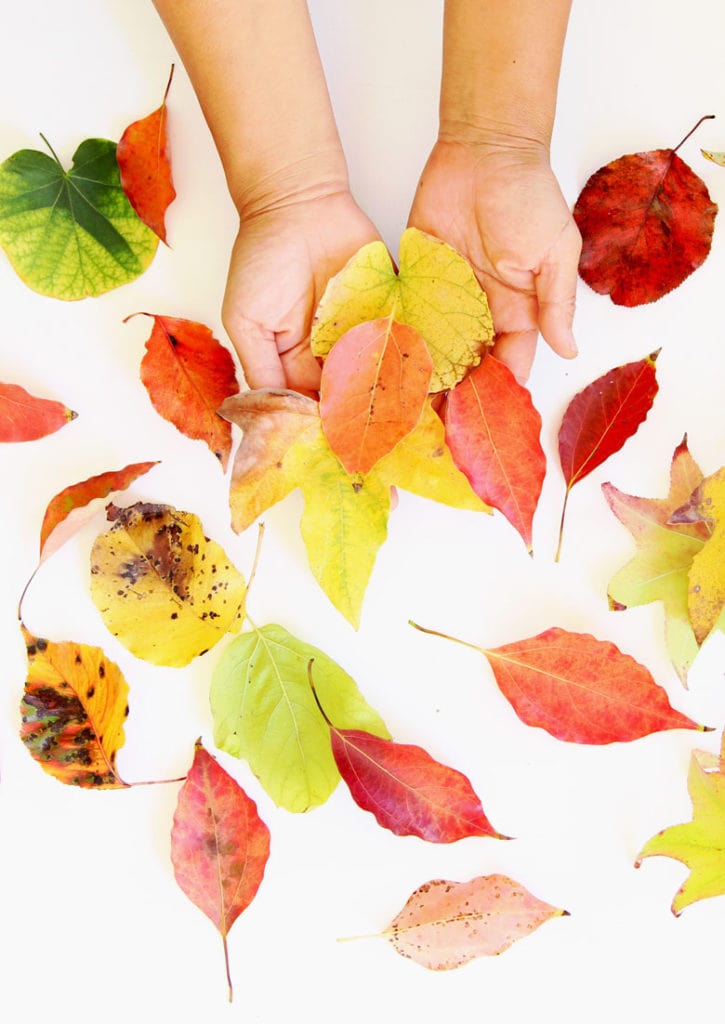
- The first thing to do before making this camping craft is to send your kids to search for leaves. They must find different kinds of leaves with different shapes and textures.
- Once your child has found the desired leaves, use the brush and put color on the front face of the leaf. They can choose one or various colors to do this.
- The next step is, with the front face down of the leaf, to help your kid with making impressions on the paper.
- Once done, let it dry, and you will be done with this. If you want, you can also use a marker to write the date and some details about the trip.
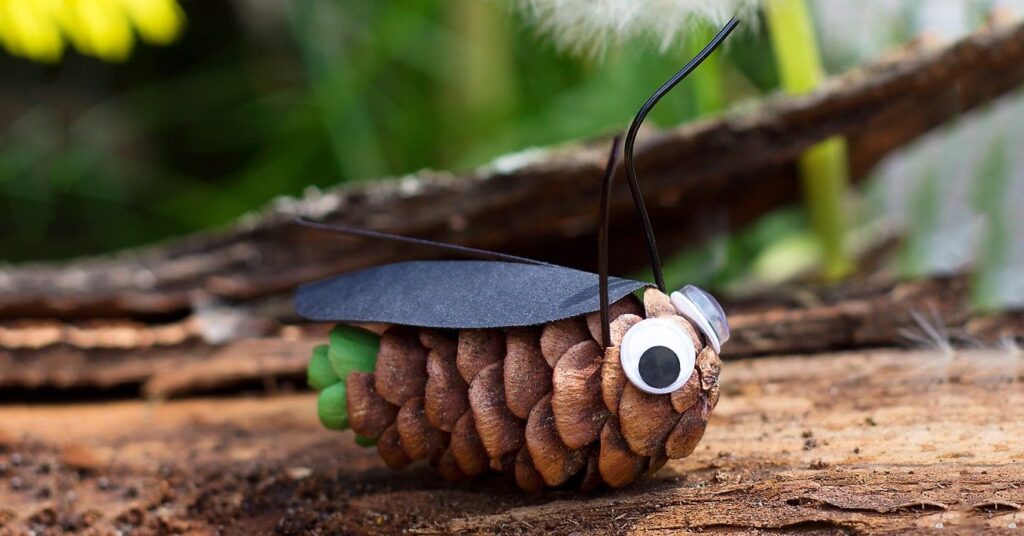
8. Pine Cone Fireflies
Making Pine Cone Fireflies is a very imaginative and fun craft. You can make pine cone fireflies for fairy gardens.
Things You Will Need
Instructions
- The first thing to do is paint the narrow end of the pine cone using green paint. Your kid can also dip the pinecones into the paint. It is a more fun way to paint the pinecone. After this, let the paint dry.
- While it is drying, cut the wings using black paper. Snip a little on the center, but not completely.
- When the paint is dried, using glue, attach these wings to the pine cone. Also, attach the googly eyes to the front of the firefly.
- Lastly, bend a wire and tie it around the pine cone to make an antennae.
These fireflies make up to be a great addition to your garden. Kids love to play with them, and they are a lot of fun.
Conclusion
These camping crafts are easy to make, and they act as a souvenir to take home after the fun is over.
It reminds your kids how much fun they had at camping. With these DIY camping crafts, you can give yourself some time.
However, it is important to plan because you will not find any of these supplies while you are at the camp.
So, you have to stock up ahead. These camping crafts are great for any camping trip, and you will give a dash of creativity to your kids with this.
So, have fun but creatively.


